Autodesk’s Tinkercad is a powerful, browser-based open-source platform designed to support STEM education. With its user-friendly interface and versatile tools, Tinkercad provides an ideal learning environment for students and educators alike. From code blocks and circuit design to 3D modeling, this platform unlocks countless possibilities for hands-on learning and innovation.
Why Choose Tinkercad for Electronics and STEM?
Tinkercad’s circuit simulator allows users to design and test circuits effortlessly. With access to a library of components, users can simulate their creations in real time, ensuring functionality and performance. The platform also supports the development of embedded projects using popular hardware like Arduino Uno, Micro:bit, and ATtiny chips.
Features of Tinkercad for Electronics Projects:
- Circuit Design: Build and test circuits with drag-and-drop simplicity.
- Simulation: Verify circuit functionality on-screen with instant feedback.
- Programming: Choose between block-based or text-based coding for hardware like Arduino and Micro:bit.
- Advanced Projects: Transition from simple circuits to embedded systems and artificial intelligence applications.
Learning Electronics and AI with Tinkercad
This tutorial series begins with the basics of electronics, teaching students how to create circuits and work with components. As the series progresses, it introduces advanced topics, including artificial intelligence. By linking fundamental knowledge with practical applications, students gain the confidence and skills needed to explore complex AI algorithms.
Key Benefits of Using Tinkercad for STEM Education:
- Hands-On Learning: Perfect for project-based STEM education.
- Accessible Anywhere: A browser-based tool that’s ideal for remote and in-class learning.
- Beginner-Friendly: Easy-to-use for students with no prior experience.
- Versatile Applications: From classroom projects to hobbyist creations, Tinkercad empowers all learners.
Explore the exciting world of Arduino, Micro:bit, and circuit simulation with Tinkercad, and take your first step toward mastering electronics and AI!
Creating Your Tinkercad Account
Getting started with Tinkercad is simple and quick. If you don’t already have an account, follow these steps:
- Visit the Tinkercad Website: Open Tinkercad in your browser.
- Sign Up: Click on the “Sign Up” button in the top-right corner.
- Enter Details: Provide your email address, create a password, and click “Sign Up”.
- Access Your Dashboard: After signing up, you’ll be redirected to your personalized Tinkercad dashboard.

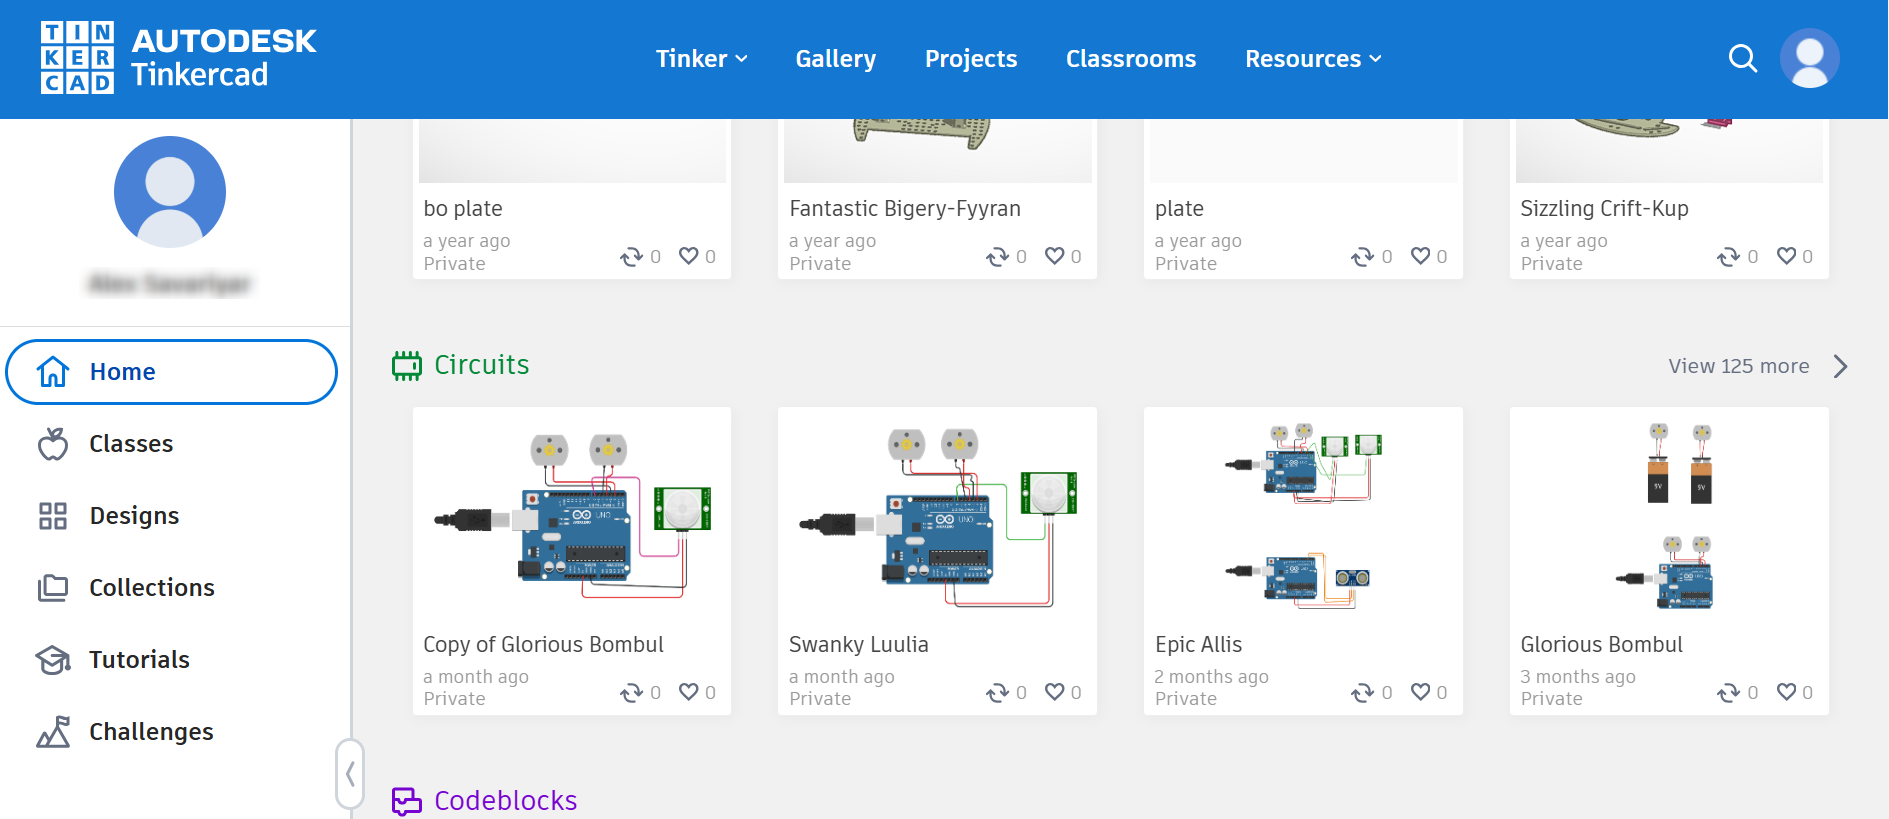
Navigating the Tinkercad Dashboard
The dashboard is your central hub for accessing Tinkercad features. Here’s a breakdown of what you’ll find:
- Main Sections:
- Classes: Manage classroom projects and assignments.
- Designs: Access your saved 3D models and circuits.
- Tutorials: Explore step-by-step guides to learn new skills.
- Design Options: Under the Designs section, you’ll find options like sample designs and the ability to create your own projects.
- Starting with Circuits: To create a new circuit, click “Make Your First Circuits Design” under the Circuits section. This will open the circuit design interface.
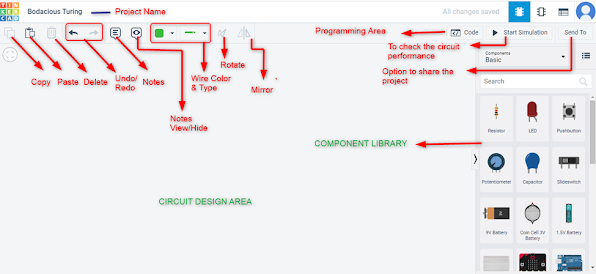
Understanding the Tinkercad Circuit Simulator
The circuit simulator area in Tinkercad is packed with tools to help you design and test electronic circuits. Here’s what each part does:
- Circuit Design Area:
- The central white space where you assemble your circuit and add components.
- Component Library:
- Located on the right, it contains all the electrical and electronic components for your projects.
- Key Tools and Menus:
- Copy/Paste: Duplicate components quickly.
- Delete: Remove unwanted components from the design area.
- Notes & View/Conceal Tool: Add personal notes for reference and toggle their visibility.
- Wire Color & Type: Customize wires by choosing from 4 wire types and 12 colors.
- Component Adjustment Tools:
- Rotate: Reposition components for easier connections.
- Mirror: Flip components to adjust orientations, like switching the positions of the anode and cathode of an LED.
- Code Area:
- Open this section to program devices like Arduino and Micro:bit directly within the circuit.
- Start Simulation:
- A critical feature to test your circuit. After completing connections and programming, click this to simulate and verify performance.
- Send To:
- Share your design with collaborators for team projects.